
Ground Beef Tacos with Taco Seasoning
Brown the beef before adding seasoning water, then reduce until the sauce coats each crumble instead of soaking the tortilla.
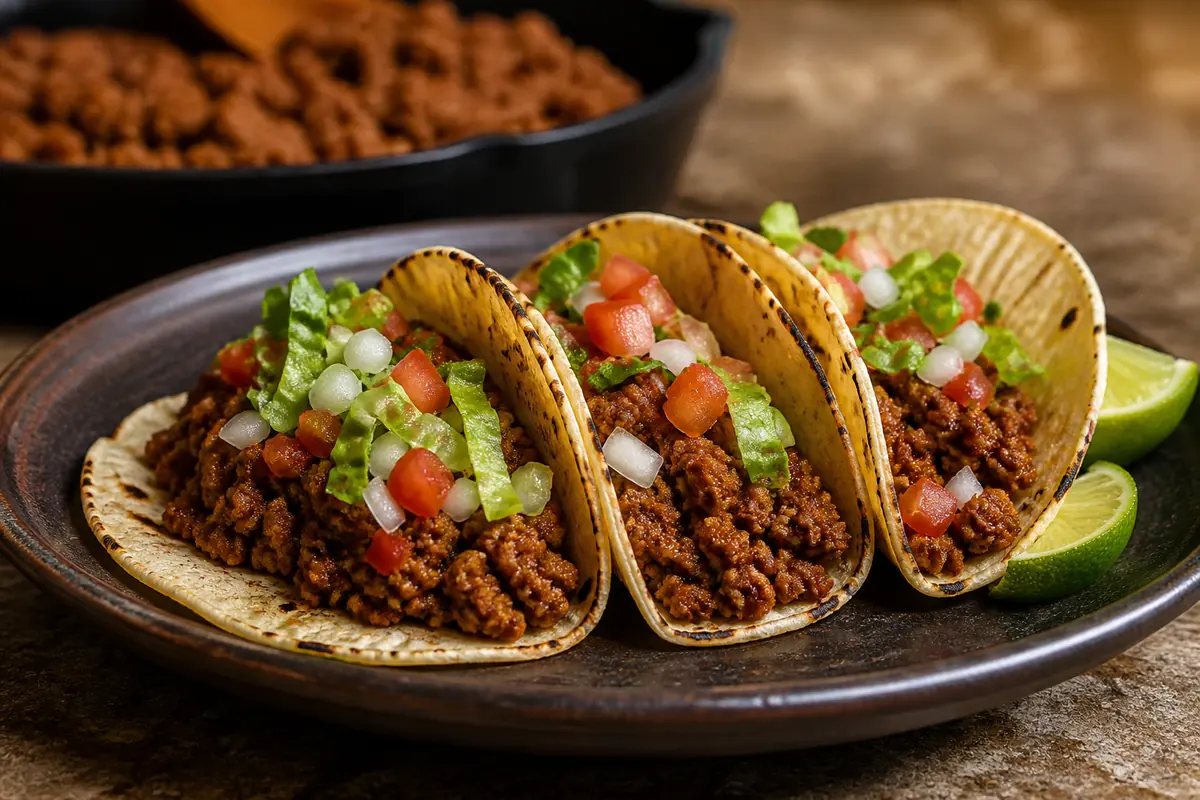
These ground beef tacos use a measured taco seasoning dose and a short water reduction. Brown first and season second for deeper flavor and a cleaner tortilla.
Ingredients
- 1 pound ground beef, 85 to 90 percent lean
- 2 tablespoons taco seasoning, adjusted for salt
- 2/3 cup water
- 8 small corn tortillas
- 1 cup shredded lettuce
- 1 medium tomato, diced
- 1/3 cup diced white onion
- 1 lime, cut into wedges
Method
- Start the beef crust Heat a wide skillet over medium-high heat. Add beef in broad pieces and leave it untouched for 2 minutes.
- Brown the crumbles Turn the beef and break it into rough crumbles. Cook until browned and no gray liquid remains, 5 to 7 minutes.
- Bloom the seasoning Sprinkle in taco seasoning and stir for 20 seconds. Add water and scrape the pan bottom.
- Reduce the taco sauce Simmer uncovered for 4 to 6 minutes until the sauce coats the meat and a spatula leaves a clean trail.
- Warm and assemble Warm tortillas in a dry skillet, rest the filling for 5 minutes, then assemble tacos with lettuce, tomato, onion, and lime.
Choose beef by the fat you can manage
Ground beef between 85 and 90 percent lean gives taco filling enough fat to brown and carry spice without leaving a deep grease pool.
Very lean beef cooks quickly and can feel dry after the seasoning liquid reduces.
| Beef | Pan behavior | Drain or keep | Water adjustment |
|---|---|---|---|
| 80/20 | Releases a visible fat pool | Spoon off most, leave a thin film | Start with 1/2 cup |
| 85/15 | Browns well with moderate fat | Drain only a deep pool | Use the recipe's 2/3 cup |
| 90/10 | Little excess fat | Keep the surface film | Begin with 1/2 cup and add only if needed |
| 93/7 or leaner | Dries quickly after browning | Do not drain | Add 1 teaspoon oil before spices if the pan is bare |
The goal is a thin film across the skillet, not a completely dry surface. Drain what pools, then keep what can carry cumin, chile, garlic, and oregano across the meat.
Choose a wide skillet that lets one pound of beef touch hot metal without forming a thick mound. A narrow pan collects steam around the crumbles and delays browning.
Give the beef room to brown
Heat the empty skillet over medium-high heat before adding the beef.
Press the meat into several broad pieces and leave them untouched for two minutes so the underside can develop a crust.
Turn the pieces, then break them into rough crumbles. Constant stirring makes many small wet surfaces and produces gray meat before the pan has a chance to brown.
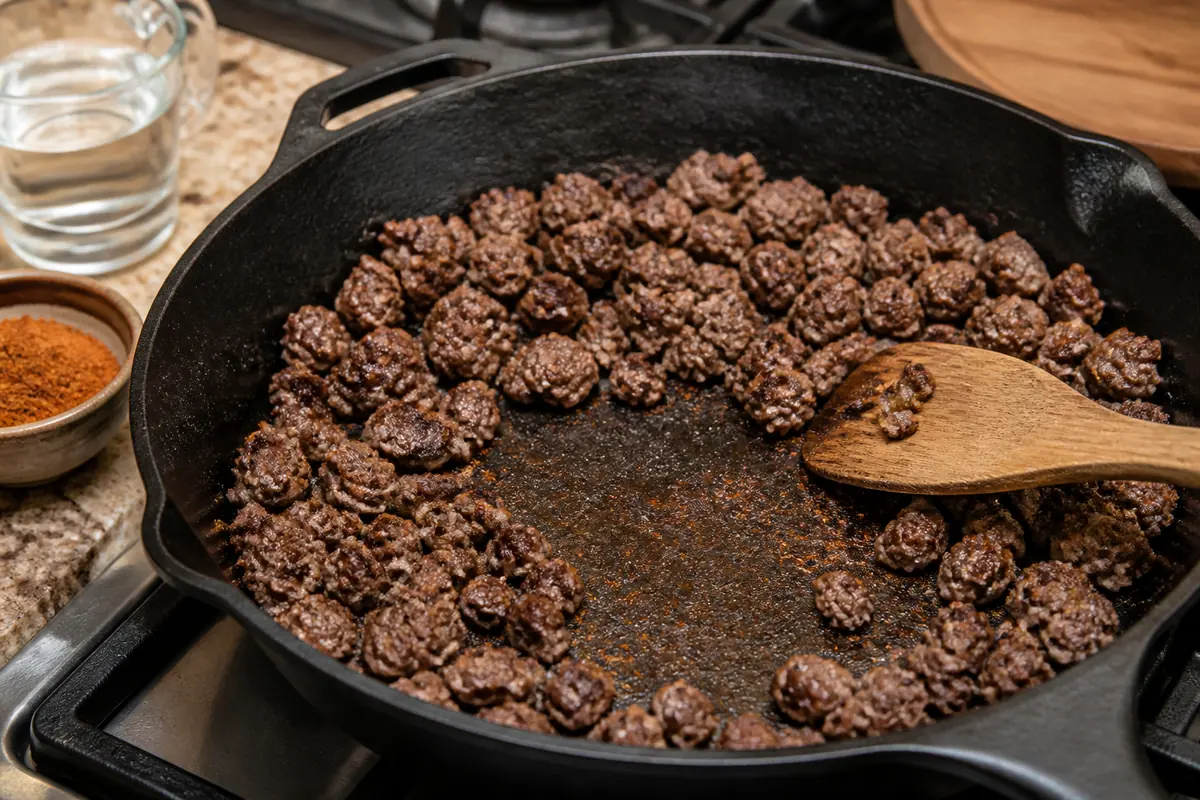
- Brown crust: Dark edges on rough crumbles.
- Open skillet: No gray liquid around the meat.
- Seasoning and water: Held until browning is complete.
Wait until the gray liquid has evaporated before draining any fat.
Pouring off the pan too early removes meat juices and does not solve the crowding that caused steaming.
A few dark deposits on the skillet are useful fond. Black patches or smoke mean the heat is too high and will make the seasoning bitter when it enters.
Measure taco seasoning against its salt
Use two tablespoons of low-salt taco seasoning for one pound of beef. Start with one and one-half tablespoons when a commercial packet lists salt near the beginning, then taste only after the sauce has reduced.
- Low-salt homemade blend
- Start with 2 tablespoons per pound
- Salt-forward packet
- Start with 1 1/2 tablespoons and hold extra salt
- Seasoning with starch
- Expect earlier thickening before all water has evaporated
- Salty toppings
- Keep the filling slightly below its final salt target
The taco seasoning substitute ratios can rebuild the blend from chile powder, cumin, paprika, garlic, onion, and oregano. Keep the salt separate when cheese, salsa, canned beans, or hard taco shells will add more later.
Stir the dry seasoning through the hot beef for about 20 seconds. This brief contact warms the spices, but stopping before the powders darken protects the chile and garlic from scorching.
Add the water only after the spices smell fragrant.
Two-thirds cup suits the 85 to 90 percent lean beef in this recipe, while leaner meat may need less at first.
Reduce until the sauce clings
Simmer uncovered and stir occasionally. The filling is ready when a spatula drawn through the pan leaves a clean path for a moment and no thin red liquid rushes back into it.
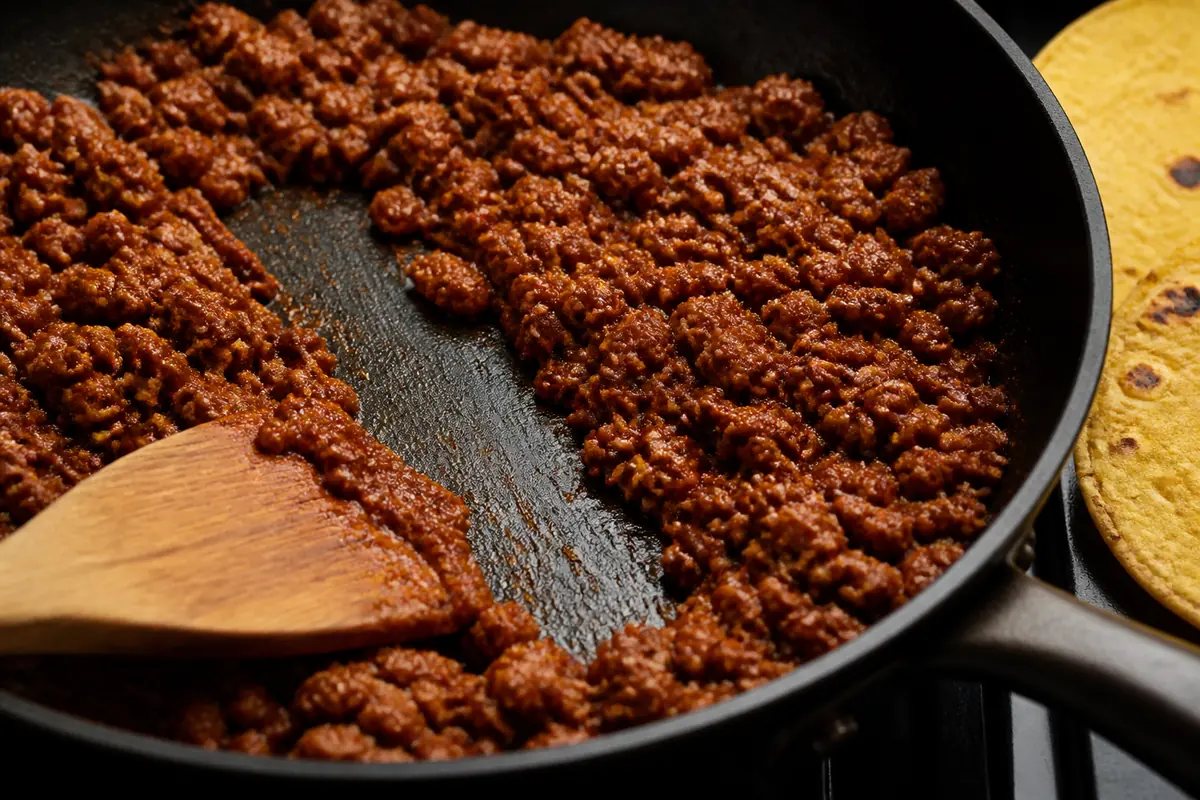
- Coated crumbles: Moist, not swimming.
- Clean trail: Pan bottom stays visible briefly.
- Tortilla test: Filling sits without dripping through.
Taste now because salt, cumin, and chile become stronger as water leaves.
A filling that seems mild halfway through the simmer may be balanced at the clean-trail stage.
Correct dryness with one tablespoon of water and thirty seconds of stirring. A soupy filling needs more uncovered evaporation or a wider pan, while an oversalted filling needs more unseasoned meat or beans rather than more water that will reduce away again.
The sauce should bind the crumbles without turning them into a paste. Packet starch can thicken before the water is gone, so also watch for liquid collecting around the skillet edge.
Warm tortillas and finish one complete test taco
Warm corn tortillas in a dry skillet for 20 to 30 seconds per side until flexible, then stack them inside a clean towel. The towel holds steam just long enough to prevent cracking without soaking the surfaces.
Let the beef rest for five minutes while the tortillas warm. The pause lets the remaining sauce settle into the crumbles instead of running into the first tortilla.
Build one taco before assembling the batch. Taste it with the planned lettuce, tomato, onion, lime, salsa, and cheese because the complete bite may carry much more salt, acid, and moisture than the skillet filling alone.
- Add the beef firstSpread a compact line of rested filling instead of overloading the center.
- Add crisp toppingsLettuce, onion, and tomato bring contrast without pressing liquid into the tortilla.
- Spoon wet salsa lastUse a modest amount just before eating.
A properly reduced filling cannot protect a tortilla from a large spoonful of watery salsa.
For make-ahead service, cool and refrigerate the filling separately within two hours. Use it within three to four days, then reheat it in a skillet with one tablespoon water until steaming hot.
Warm tortillas just before eating rather than storing assembled tacos, which soften quickly.